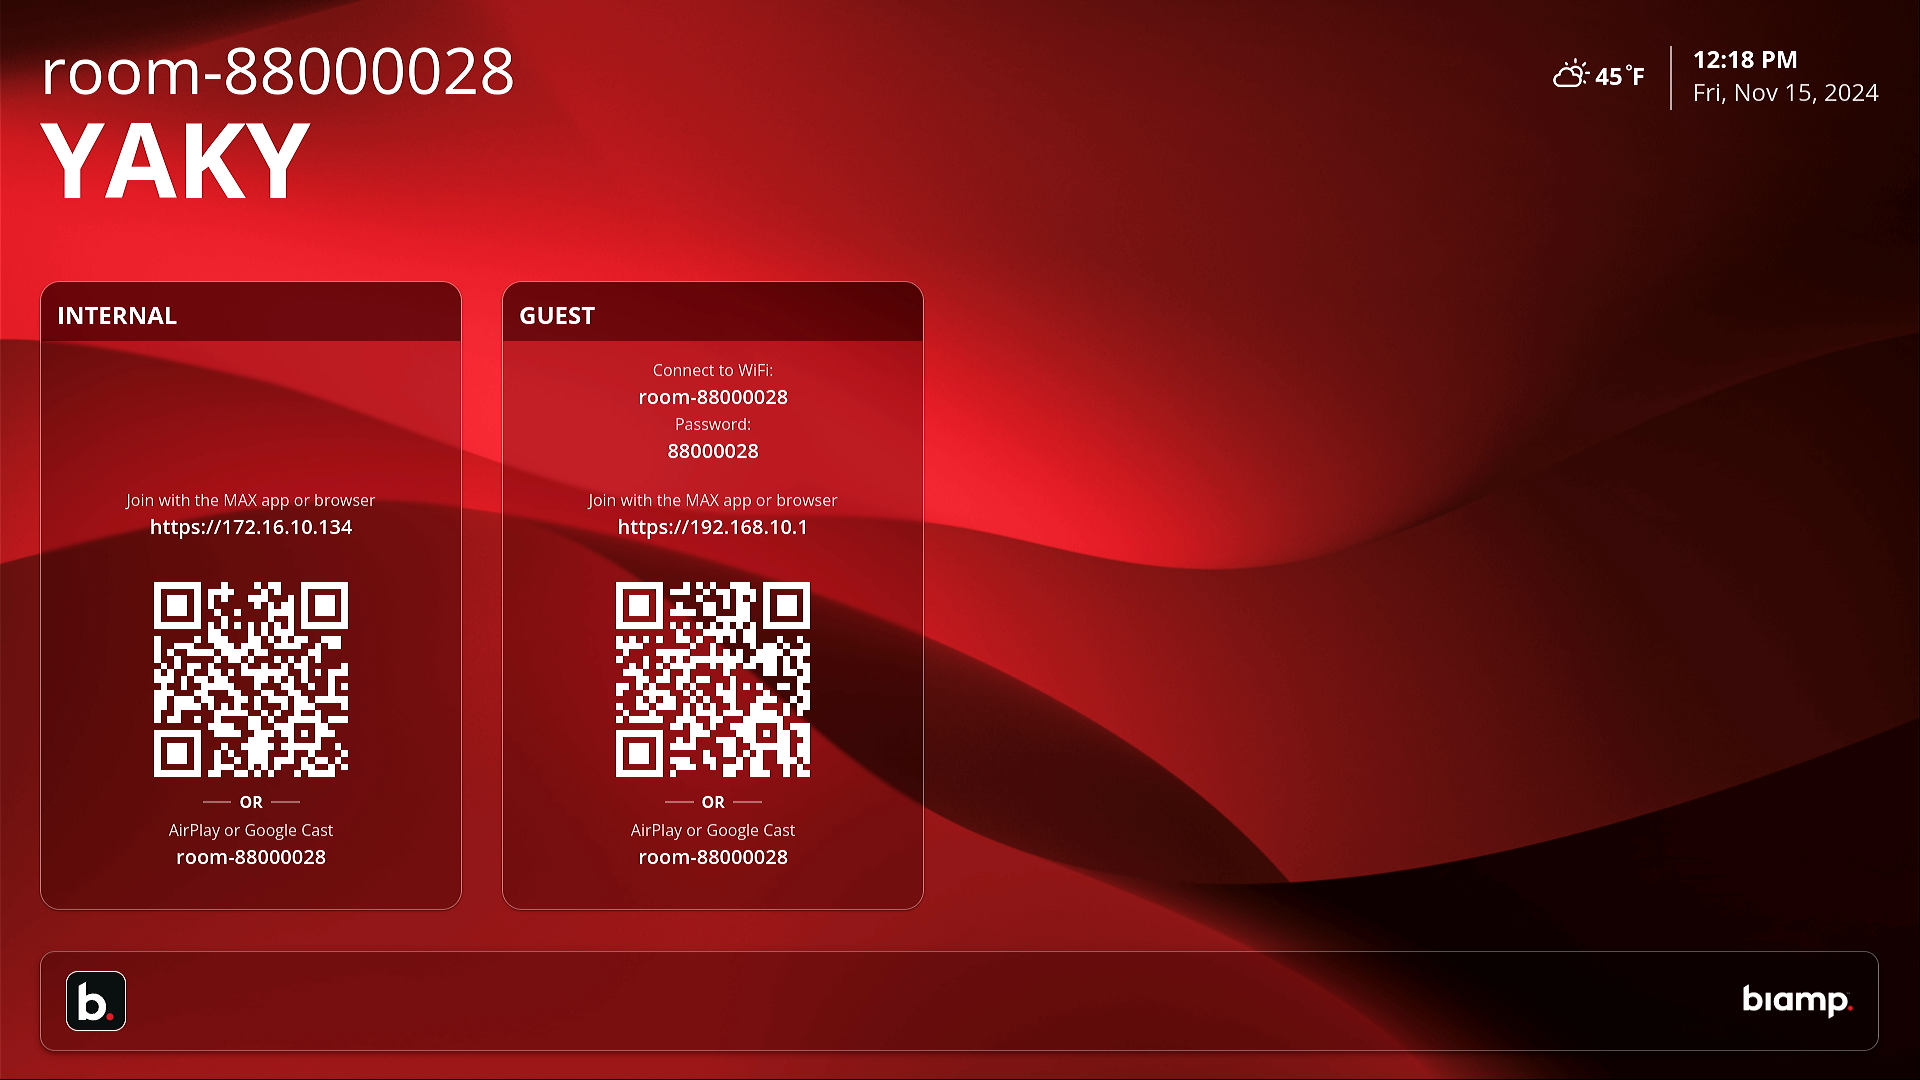
Once the MAX Connect is powered up, a Welcome Screen will appear on the connected conference room screen.
Once the Welcome Screen is visible, the meeting room is ready for users to join the current, automatically generated session. Please see the User Apps sections of this help system for how end-users can connect their devices to a meeting session.
For using the meeting display screen, see the following topics in this section:
The room display and its meeting settings can be controlled by three means:
Note: The network connection settings and the display elements such as the background image, weather location, date, and time are configured using the MAX Connect's onboard Administration Console. The exception is the auto-generated Session ID.
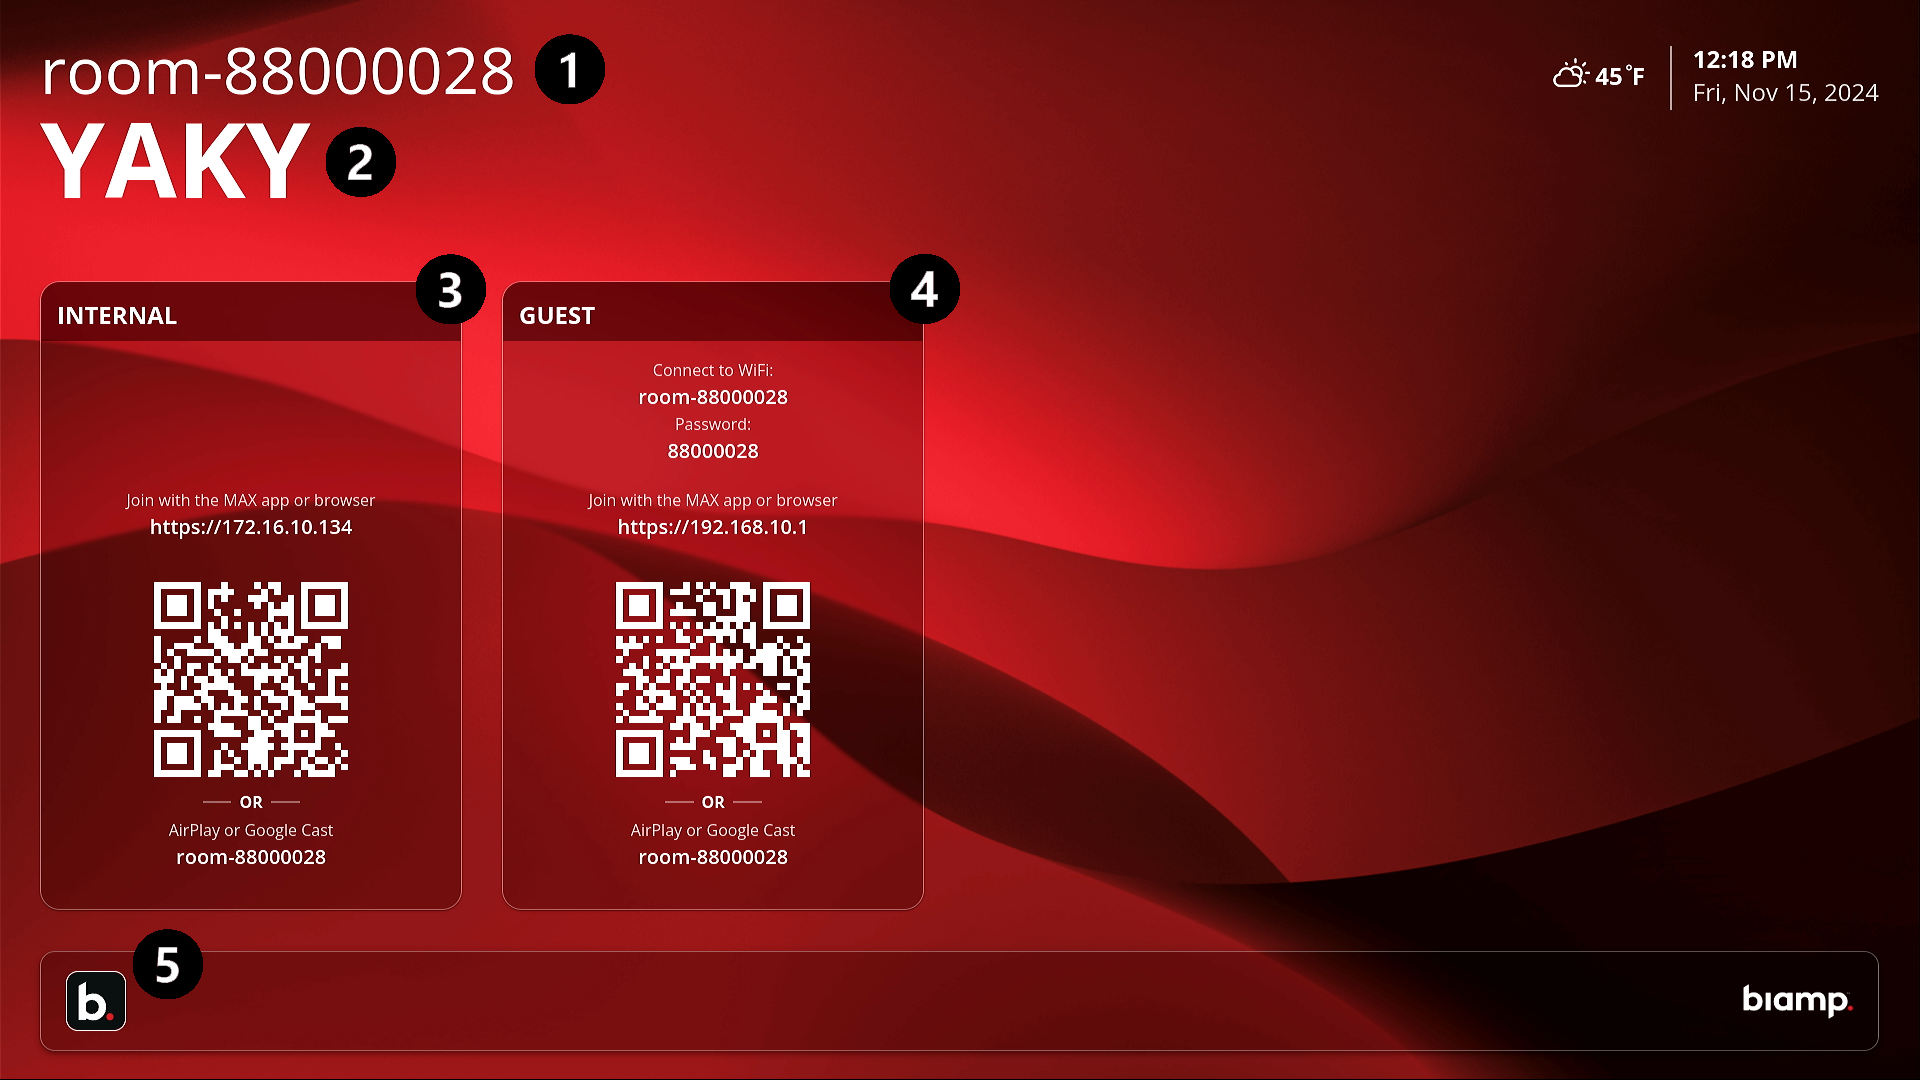
1. Room Name
2. Session ID
3. Internal Panel
AirPlay is a registered trademark of Apple Inc. Google Cast is a trademark of Google LLC.
4. Guest Panel
5. b.Menu Button
The settings can be accessed by
During presentations when participants are sharing content, an expandable Info Bar will be available at the bottom of the display screen. The bar shows session connection information such as the session ID, room IP address, and any WiFi information.
Select the b.menu button on the display screen or hand-held remote to access the display screen's Content Sharing controls.
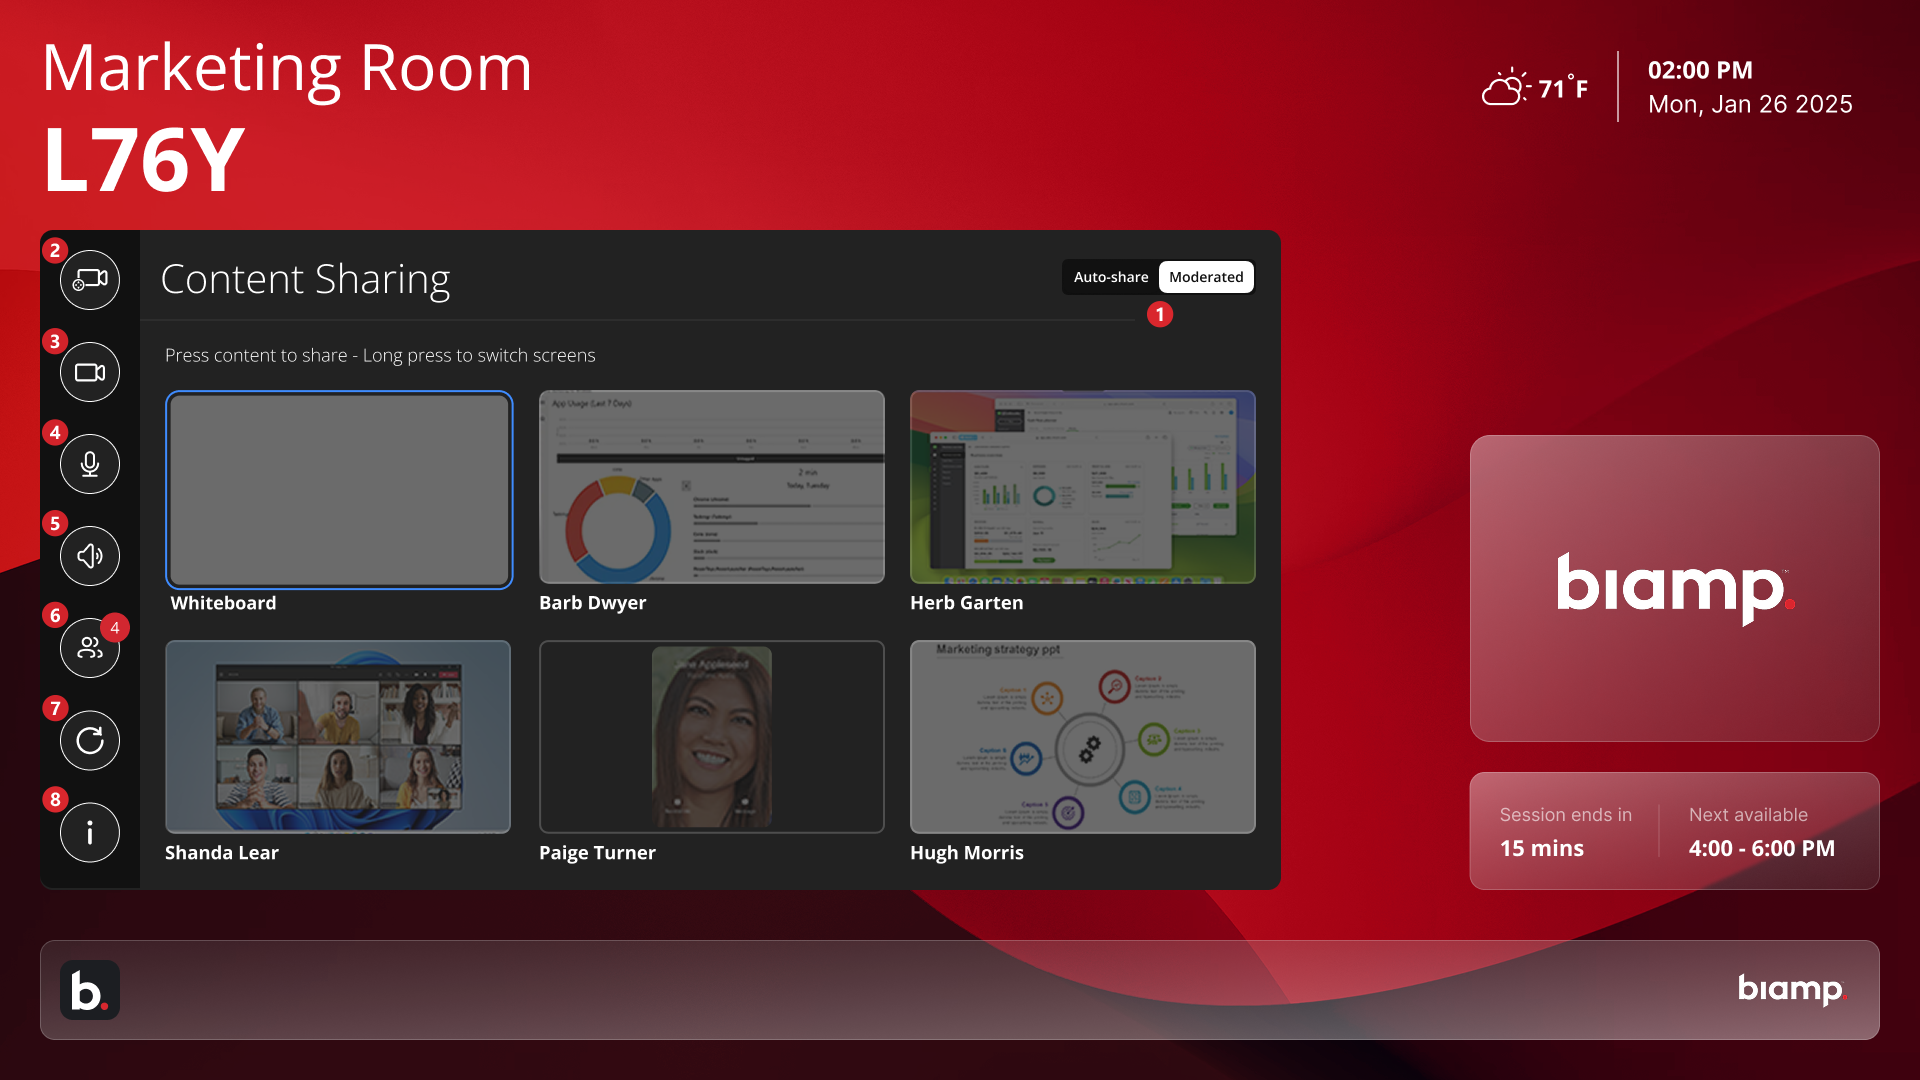
Camera settings button: The hand-held camera button with a disc brings up the settings window for the room camera. This includes toggling between auto-frame focus and static camera views.
Camera button: The video camera button icon without a disc toggles the room's camera on and off.
Microphone button: The microphone icon button mutes and unmutes the room's microphone.
Volume button: Selecting the speaker button brings up a volume level slider for the room speaker.
Participants button: Pressing the people icon button displays a list of current participants. The MAX Connect supports a maximum of 30 participants.
Reset Session button: The cycle icon button ends the current session and starts a new one.
This disconnects all current users. Anyone wishing to rejoin must enter the new session ID.
Room "i" Information button:
MAX Connect firmware version
The MAX Connect serial number
Ethernet IP address
Wireless IP address
URLs here relate to the Administration Console and can be accessed via Ethernet connection or the MAX Connect's access point.
Tap the camera icon on the right side of the Commands and Settings ribbon at the bottom of the screen.
The available Camera settings are:
A connected room camera can either dynamically focus on speakers during a meeting or can be set to one of four static views. Views can be set useing a touch-enabled display (if installed in the room) or the hand-held remote.
Select a static view by
Edit and save a Preset view