The optional Touch 8 MAX Controller can be used to control the display and attached peripherals as well as to start a new meeting session.
Contents
See the Touch 8 MAX and the MAX Connect installation and setup guides for how to install and connect the Touch 8 Max panel in a MAX Connect-equipped conference room or huddle space.
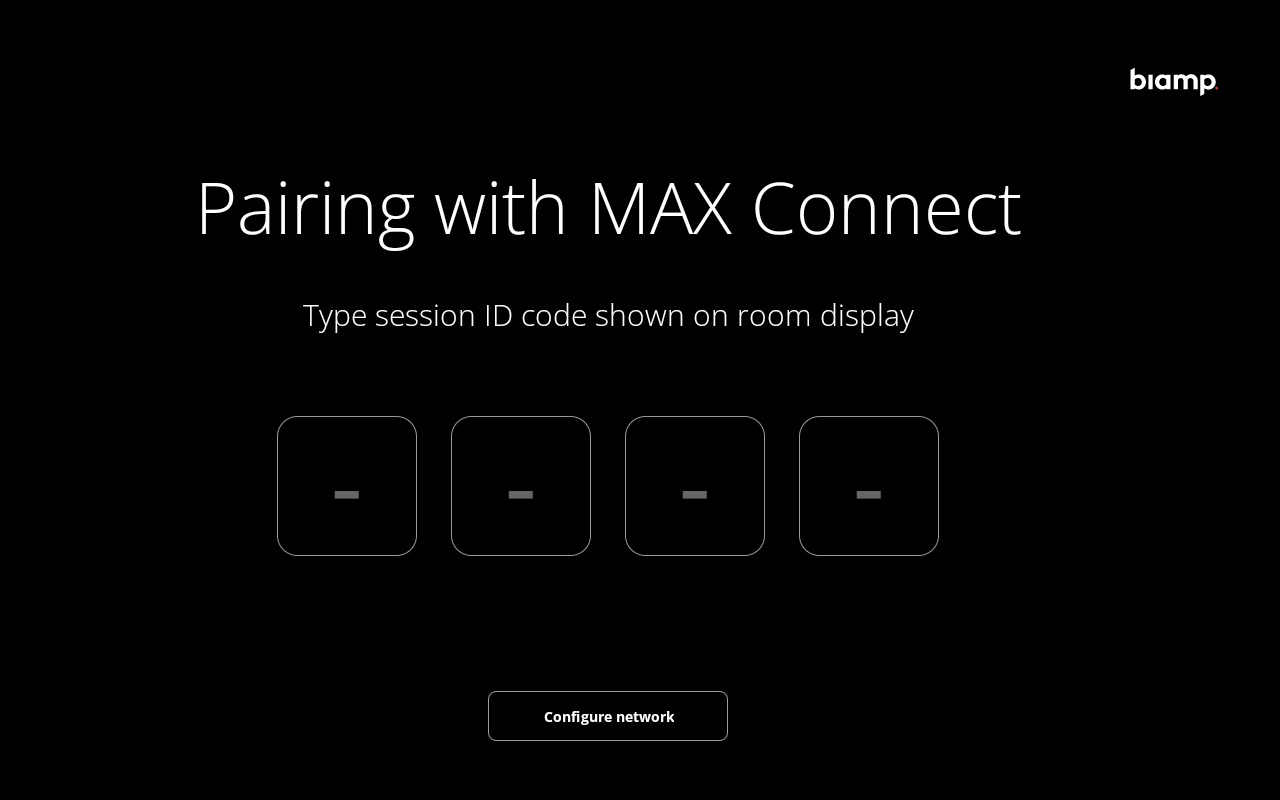
Once connected to a PoE switch or PoE injector, the Touch 8 MAX panel automatically powers on. During the first power up or following a factory reset, the screen will land on a Pairing page.

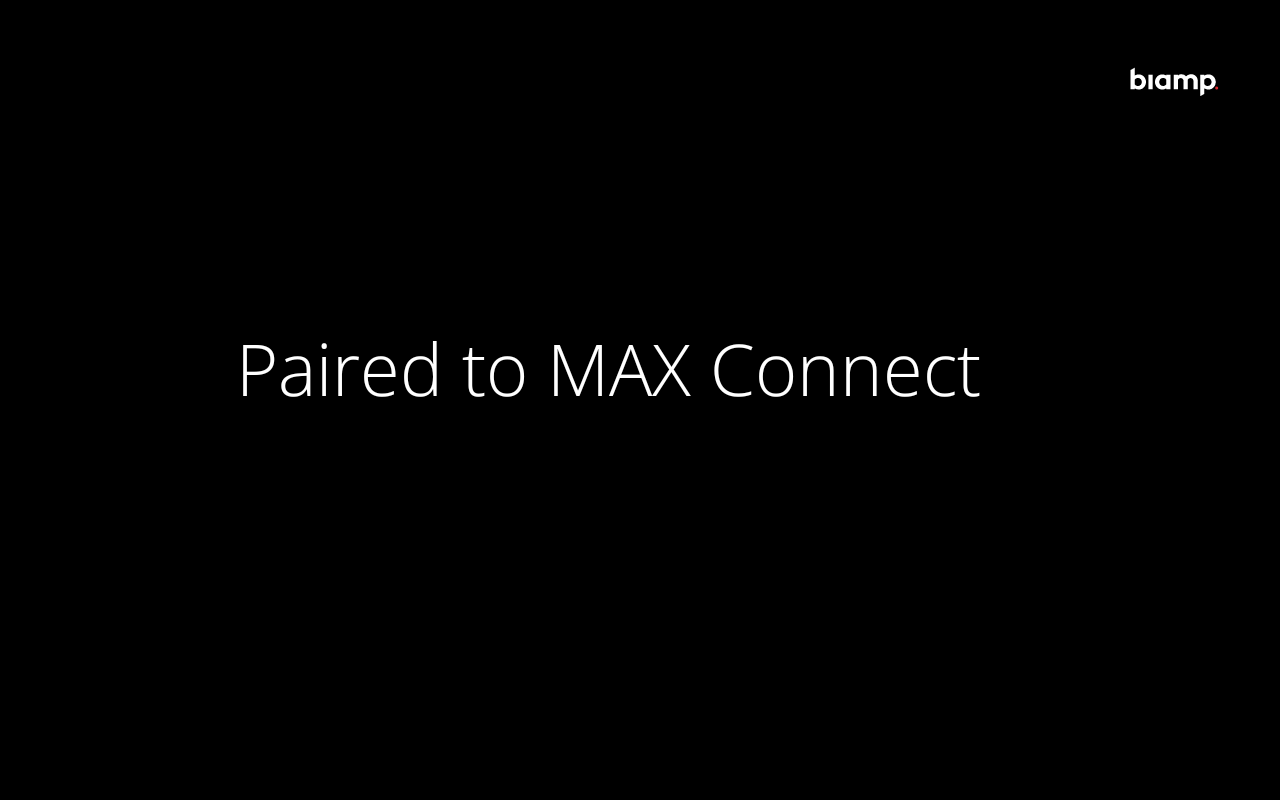
A successful pairing brings up a confirmation screen.
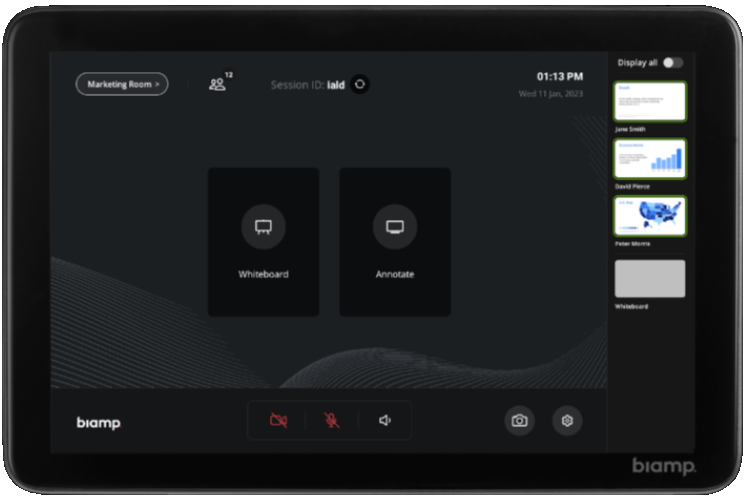
Once powered and paired, the Touch 8 MAX panel displays its homescreen.
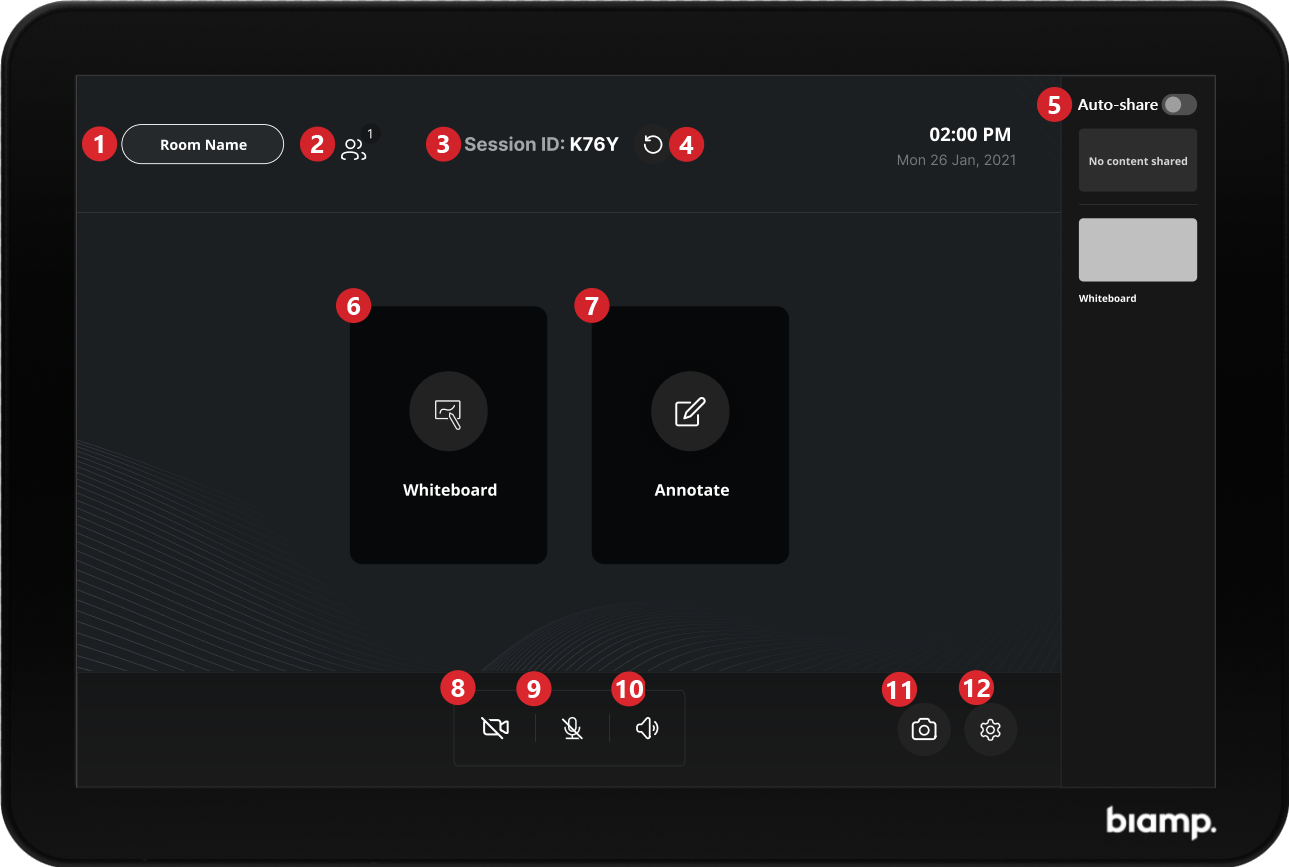
1. Room Name
This field shows the currently assigned room name.
2. Participants button
Displays the number of participants connected to the session. Tapping this button brings up a screen showing the participant's screen names.
3. Session ID
Displays the Session ID used by end-users to join the current meeting session.
4. New Session button
5. Auto-share
6. Whiteboard button
Tap to display the room's whiteboard on the room screen and Touch 8 Panel.
7. Annotate button
Click the Annotate button to select and annotate the content being shared by participants.
8. Camera On/Off
The video camera-in-profile button turns the camera on and off.
9. Microphone button
The microphone icon button mutes and un-mutes the system's microphone.
9. Volume button
Brings up and then dismisses a volume slider control for the meeting room's speaker.
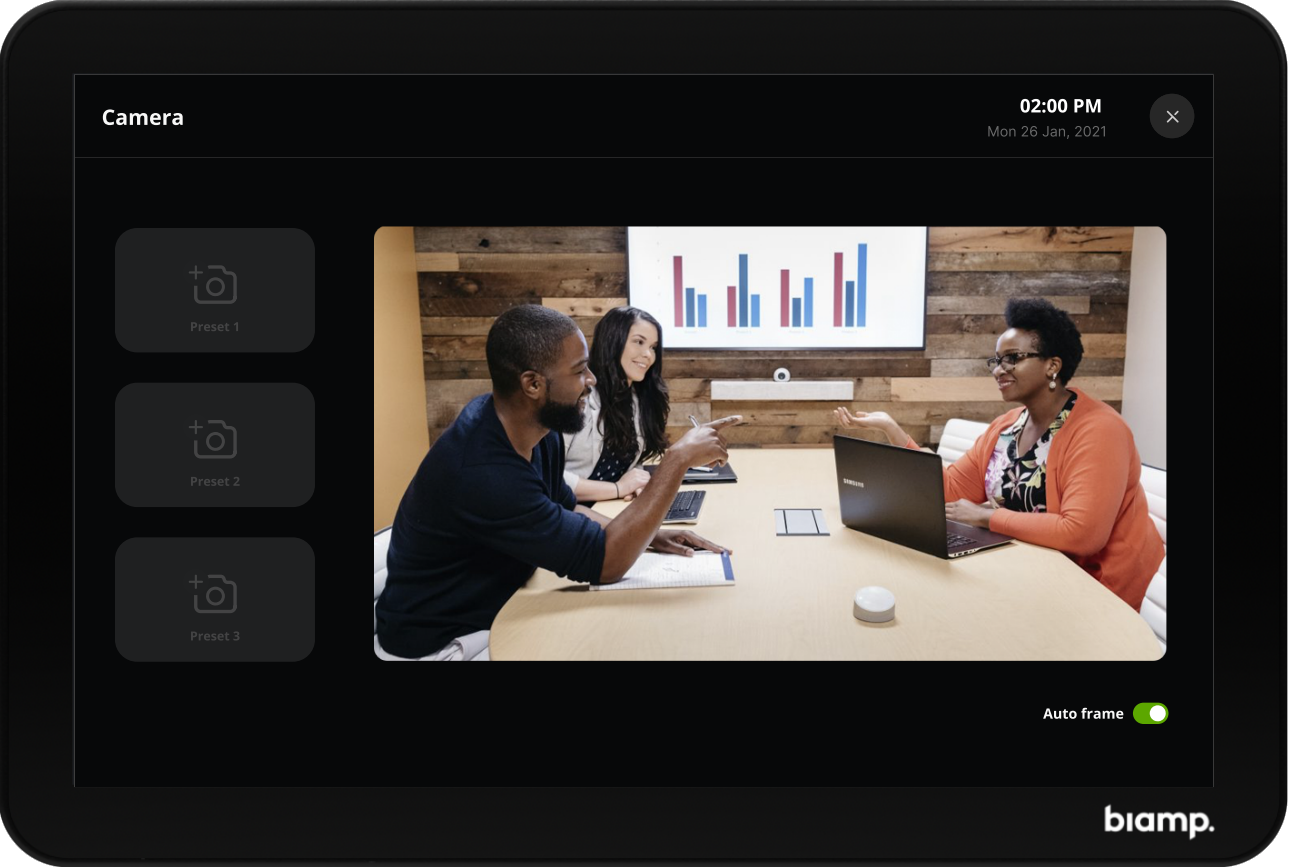
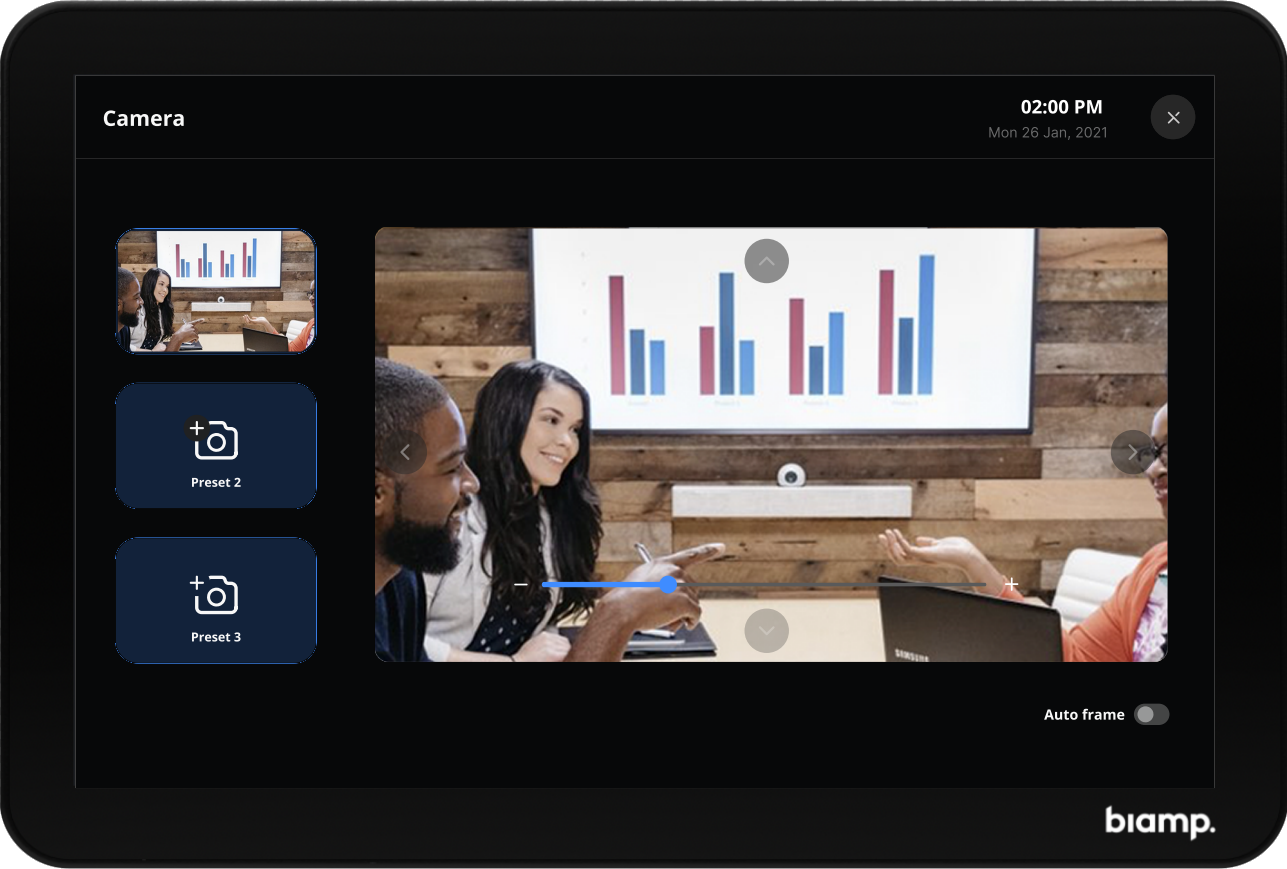
10. Camera Settings
The hand-held camera button opens the Camera Settings menu.
11. Settings button
The cog settings button brings up the MAX Connect's Administration Console, which includes:
Note Accessing the settings requires the password for the Administration Console.
To open the session's whiteboard on the room screen and the Touch 8 panel, tap the Whiteboard icon near the center of the screen.
Tapping the whiteboard in the Auto-share pane will also share the whiteboard with the participants.
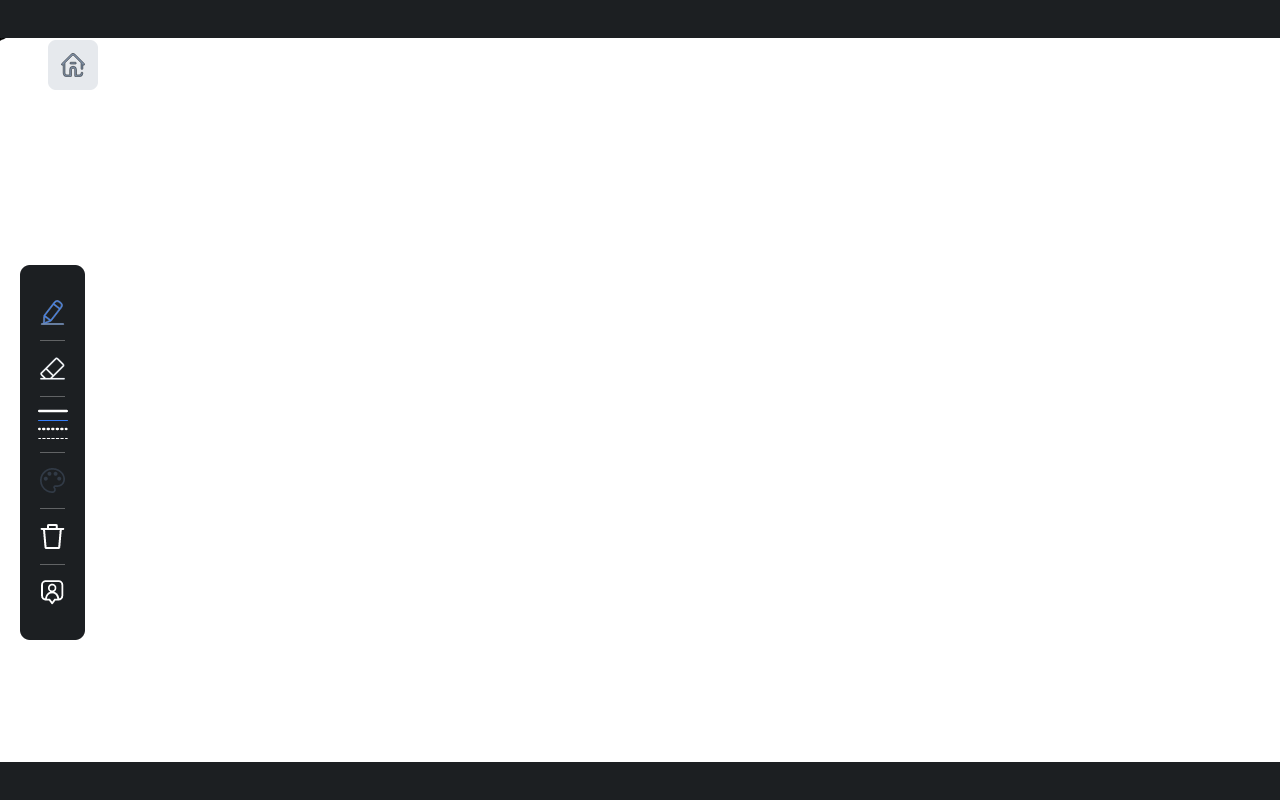
To annotate the whiteboard using the Touch 8 screen, click on the chevron tab on the left side of the board.
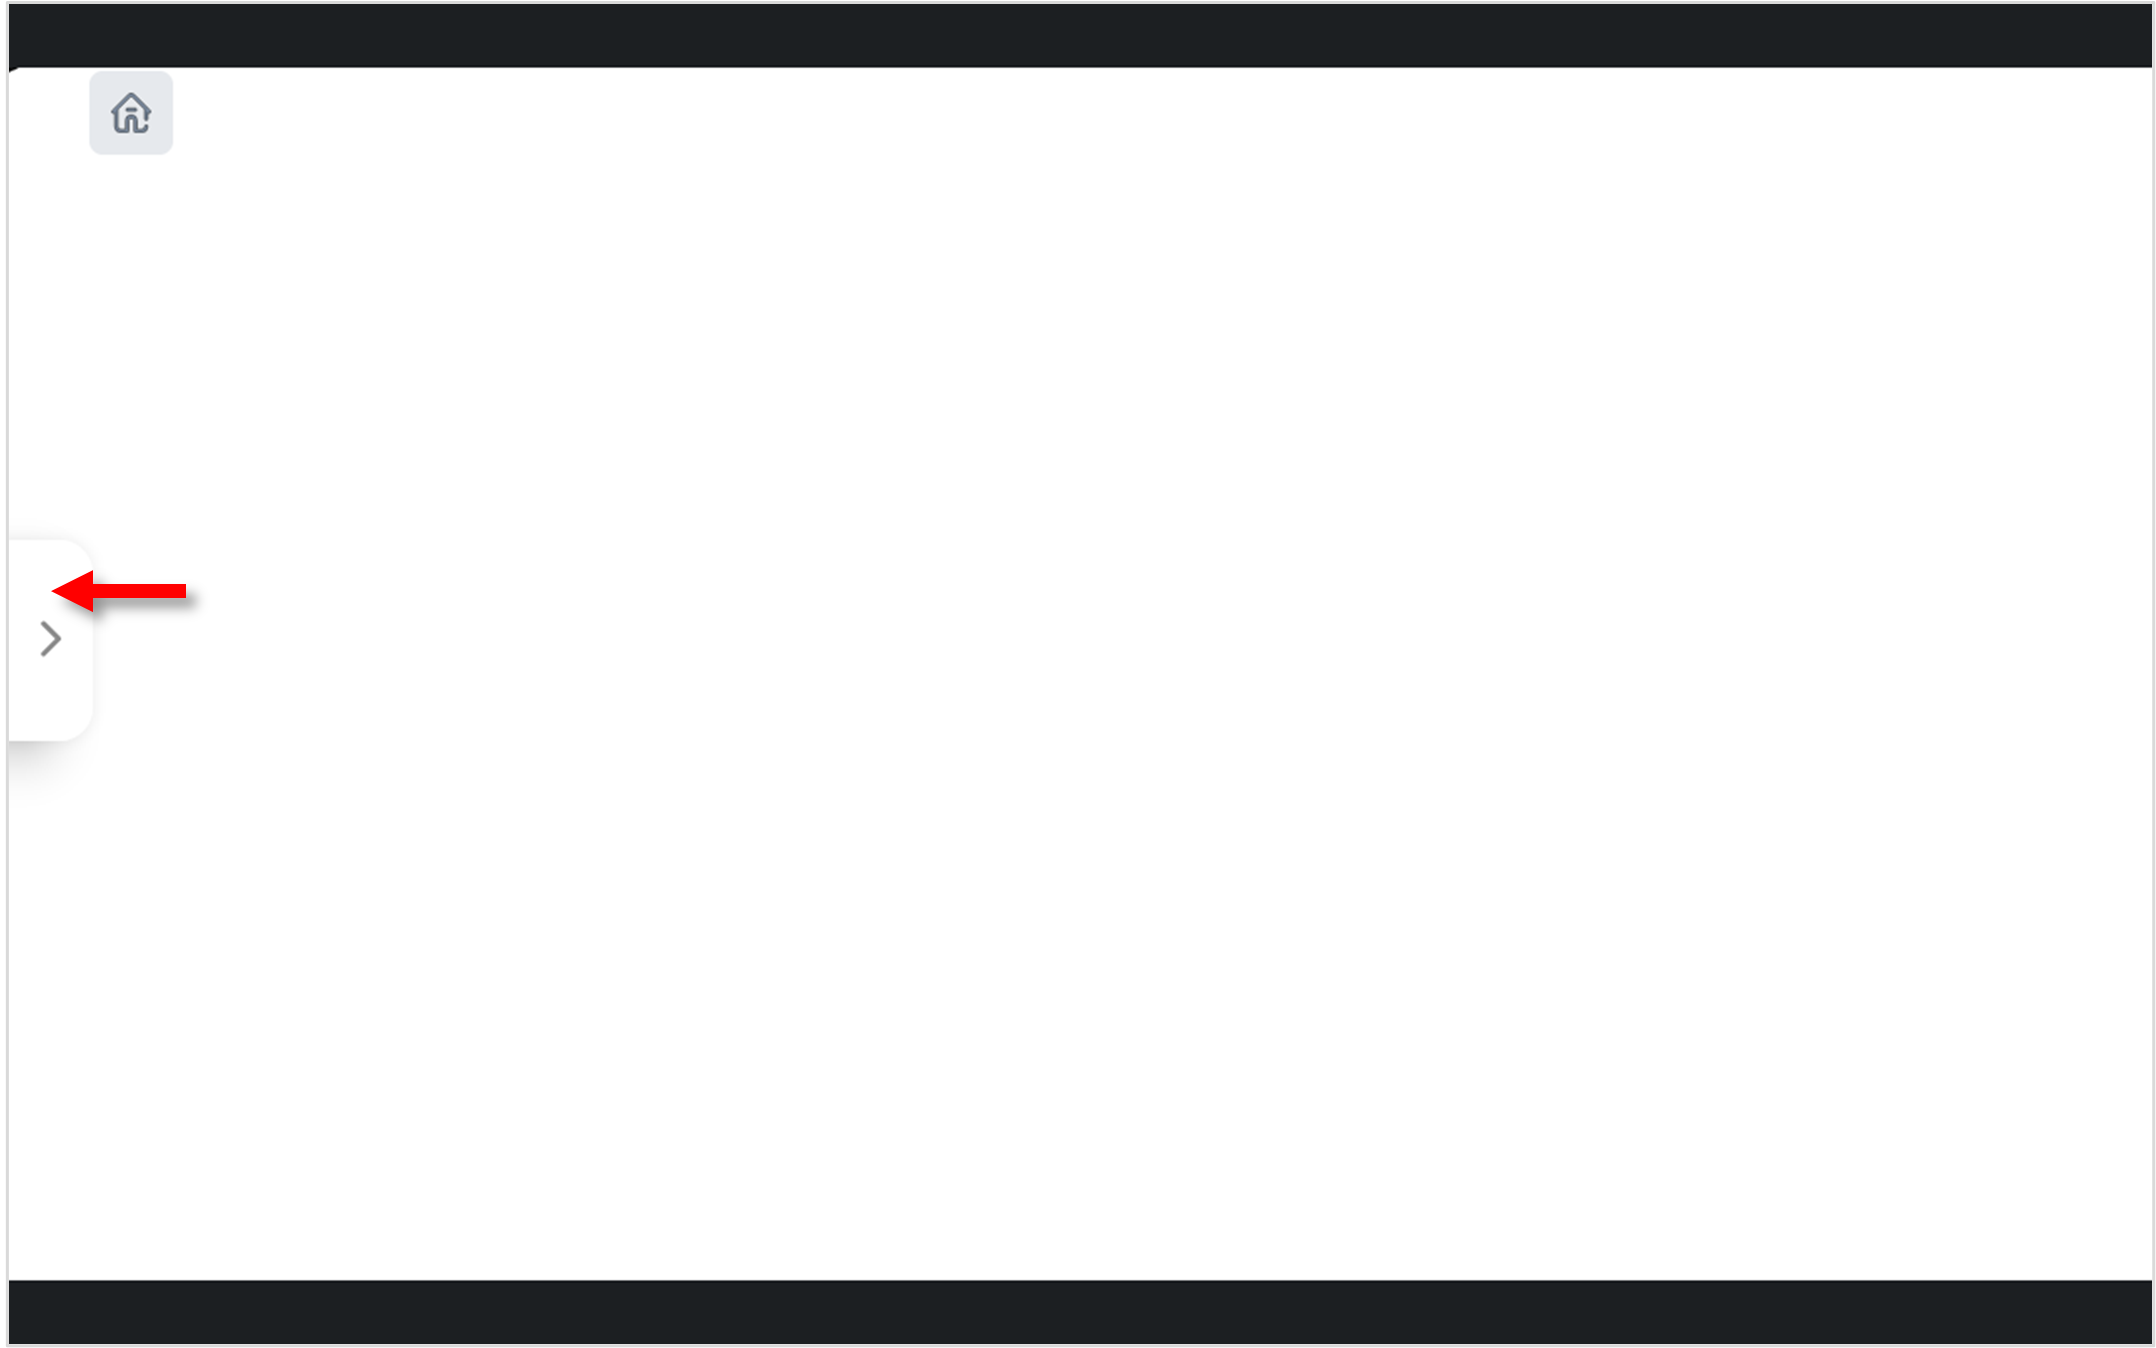
This brings up the annotation menu with a variety of drawing options and available sub-menus.
To annotate a shared content screen, tap the Annotate button near the center of the home screen, then select the screen you wish to mark up.
Tap the camera icon on the right side of the Commands and Settings ribbon at the bottom of the screen.
The available Camera settings are:
The Systems Settings menus provide configuration settings options and controls for both the Touch 8 Panel as well as a limited set of the overall MAX Connect system's settings. For the full range, you must access the MAX Connect's Administration Console.
Tap the settings icon to open settings.
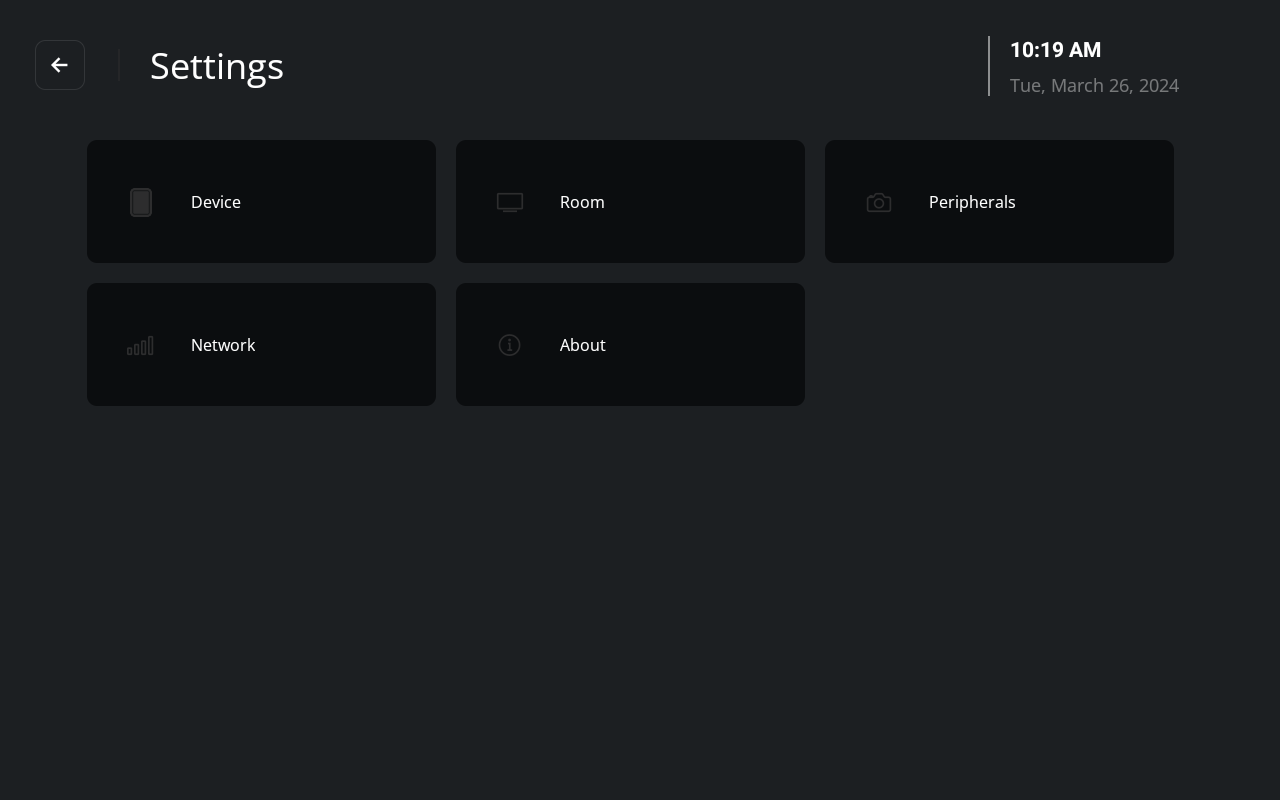
The following tabs can be found under the Device menu.
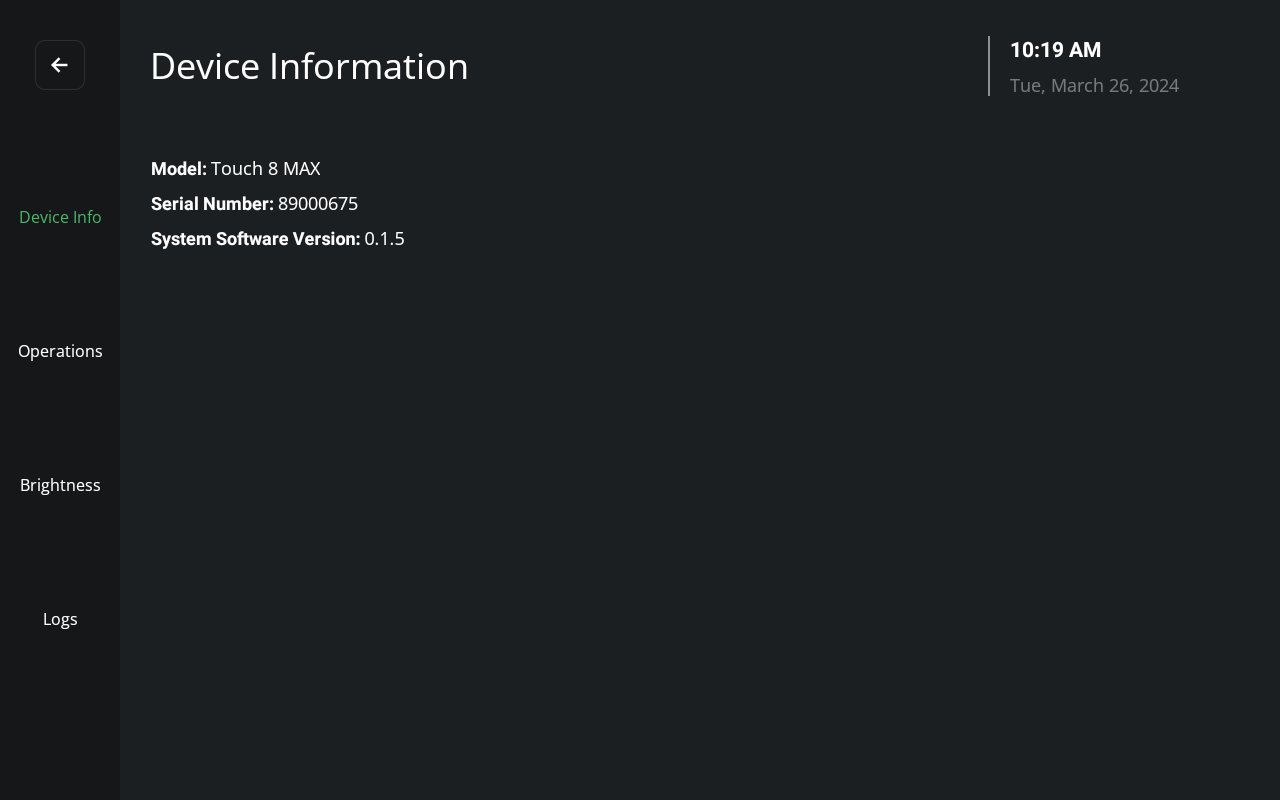
Device Info tab
Operations tab
Brightness tab
Logs tab
There are two fields under the Room menu.
This menu has three dropdown fields for selecting among connected peripheral devices. Only one of each peripheral type may be selected at a time.
The network menu has displays and controls for the MAX Connect system's LAN Ethernet and WiFi settings:
Shows the current end-user license agreement for the Touch 8 MAX Panel.